Building a Quarkus CRUD application
I’ve started working more with cloud applications recently, and I would like to share a very simple CRUD application that I made with Quarkus (a Java framework) to get started and learn the basics of this technology, which is very similar to Springboot, but more performance oriented in distributed systems in the cloud.
The application is very simple: we will make our Quarkus app communicate with a local Postgres database, running inside a Docker container, and using Postman we will be able to test the REST API.
Getting Java and Maven
First, we need to make sure we have JDK 17+ and Maven installed:
- JDK 17+ with
JAVA_HOMEenvironment variable properly configured - Apache Maven 3.9.9 or newer
- Docker 28.2.2
You can use your terminal to check if everything is installed.Run java --version, mvn --version and docker --version to verify that:
1
2
3
4
5
6
7
8
9
10
11
12
13
$ java --version
openjdk 17.0.15 2025-04-15 LTS
OpenJDK Runtime Environment Corretto-17.0.15.6.1 (build 17.0.15+6-LTS)
OpenJDK 64-Bit Server VM Corretto-17.0.15.6.1 (build 17.0.15+6-LTS, mixed mode, sharing)

$ mvn --version
Apache Maven 3.9.9 (Red Hat 3.9.9-14)
Maven home: /usr/share/maven
Java version: 21.0.7, vendor: Red Hat, Inc., runtime: /usr/lib/jvm/java-21-openjdk
Default locale: en_US, platform encoding: UTF-8

$ docker --version
Docker version 28.2.2
Getting our first Quarkus code base
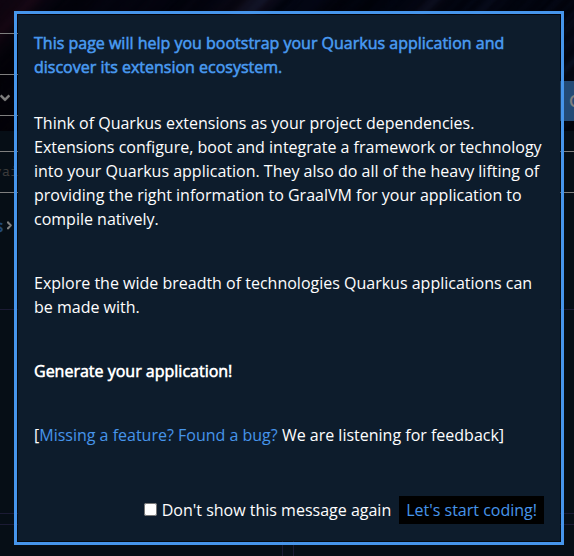
First of all, it’s important that we get Maven and Java in our machine to build and run our application. We can start by accessing code.quarkus.io. The first we access it, we can see a brief explanation as how extensions/dependencies work within Quarkus apps:
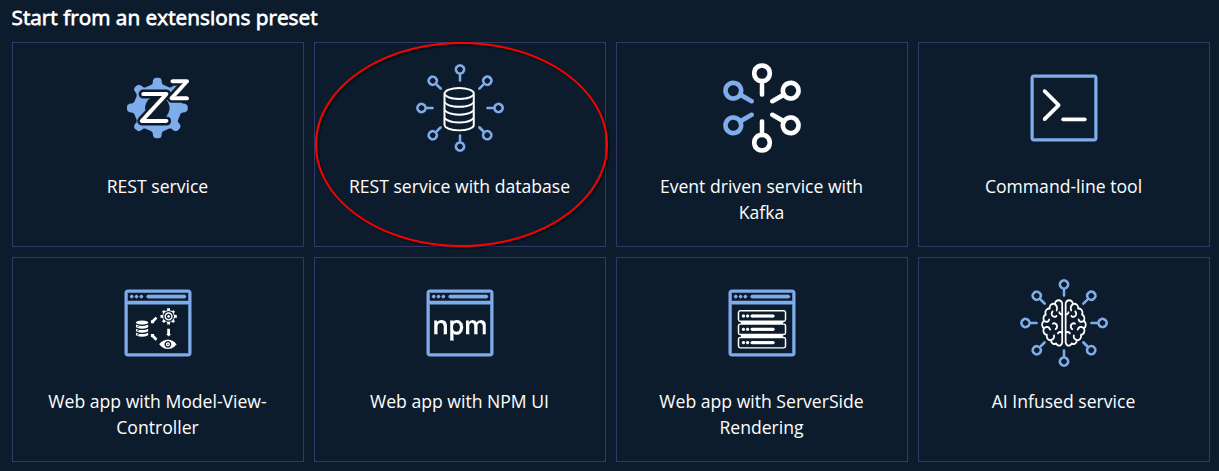
In this page, we can basically build a starting point for a Quarkus application, selecting some dependencies that will be downloaded with our initial code base to get started. We will be choosing the “REST service with database”:
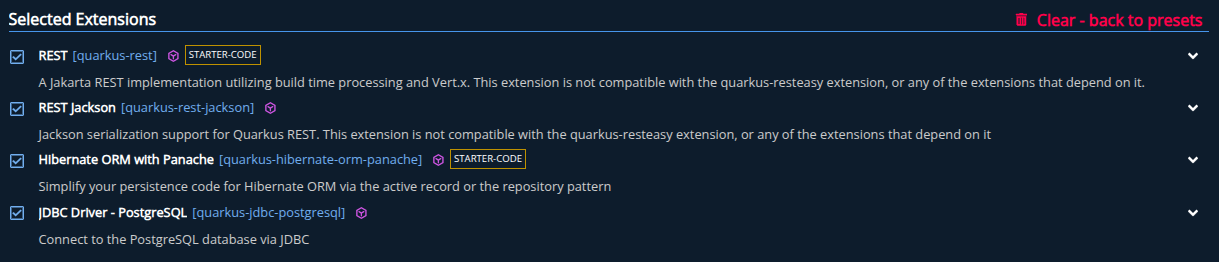
This will include the following dependencies inside the POM.xml file that Maven uses to manage our project’s dependencies:
Finally, we will be using the following initial configuration for our application:

Then we can download the project’s ZIP to our computer.
Getting the needed Maven Dependencies
After downloading and unziping our project, inside the project’s directory, we can quickly test the sample code that came with it. Run ./mvnw quarkus:build to download the dependencies (defined in POM.xml) and compile the Java code. Next, we can run ./mvnw quarkus:dev to test the application. Now we can perform a GET call into localhost:8080/hello and see a message from our Quarkus app’s response.
Setting up a PostgreSQL local database with Docker
We will be using a Postgres image to quickly deploy a SQL database for ou application to connect to. Having docker installed, when can just use the official postgres image to get a container running in our system:
1
$ docker run --name db-postgres -p 5432:5432 -e POSTGRES_USER=postgres -e POSTGRES_PASSWORD=postgres -d postgres
This will create and run a container with our postgres database in localhost:5432. We can access this database with TCP/IP connections using the following information:
Database: postgres (default name, it’s the same as the username)Username: postgresPassword: postgres
Creating our API to register new employees
The Quarkus API for this application will have the endpoint localhost:8080/employees, where the CRUD service will get HTTP calls for our employee register service:
The API can be grossly built as follows:
1
2
3
4
5
6
7
8
9
10
11
12
13
14
15
16
17
18
19
20
21
22
23
24
25
26
27
28
29
30
31
32
33
34
35
36
37
38
39
40
41
42
43
44
45
46
47
48
49
50
51
52
53
54
55
56
@Path("/employees")
@Consumes(MediaType.APPLICATION_JSON)
@Produces(MediaType.APPLICATION_JSON)
public class EmployeeController
{
    @Inject
    private EmployeeService employeeService;

    @POST
    public Response createUser(EmployeeEntity employee) {
        try {
            EmployeeEntity created = employeeService.createUser(employee);
            return Response.status(Response.Status.CREATED).entity(created).build();
        }
        catch (PersistenceException e) {
            return Response.status(Response.Status.BAD_REQUEST).entity("Database error: " + e.getMessage()).build();
        }
        catch (ConstraintViolationException e) {
            return Response.status(Response.Status.CONFLICT).entity("Constraint violation: " + e.getMessage()).build();
        }
    }

    @GET
    public Response findAllEmployees(@QueryParam("pageNumber") @DefaultValue("0") Integer pageNumber, @QueryParam("pageSize") @DefaultValue("5") Integer pageSize) {
        List<EmployeeEntity> employees = employeeService.findAll(pageNumber, pageSize);
        return Response.ok(employees).build();
    }

    @GET
    @Path("/{id}")
    public Response findEmployeeById(@PathParam("id") String employeeId) {
        EmployeeEntity employee = employeeService.findById(employeeId);
        if (employee != null) {
            return Response.ok(employee).build();
        }
        return Response.status(Response.Status.NOT_FOUND).entity("Employee with code " + employeeId + " not found!").build();
    }

    @PUT
    public Response updateUser(EmployeeEntity employeeEntity) {
        EmployeeEntity updatedEntity = employeeService.updateUser(employeeEntity);
        if (updatedEntity != null) {
            return Response.ok(updatedEntity).build();
        }
        return Response.status(Response.Status.NOT_FOUND).entity("Employee with code " + employeeEntity.id + " not found!").build();
    }

    @DELETE
    @Path("/{id}")
    public Response deleteUser(@PathParam("id") String employeeId) {
        if (employeeService.deleteUser(employeeId) > 0) {
            return Response.ok("Employee " + employeeId + " deleted from the database!").build();
        }
        return Response.status(Response.Status.NOT_FOUND).entity("Employee with code " + employeeId + " not found!").build();
    }
}
In our application.properties file, we need to configure our database properties for dev mode, we do something like so:
1
2
3
4
5
6
7
8
9
10
11
12
13
14
15
16
17
# JDBC URL - assuming the Postgres container is accessible as localhost
%dev.quarkus.datasource.jdbc.url=jdbc:postgresql://localhost:5432/postgres
%dev.quarkus.datasource.jdbc.max-size=16

# Database credentials (from the docker run command)
%dev.quarkus.datasource.username=postgres
%dev.quarkus.datasource.password=postgres

# Database driver (PostgreSQL)
%dev.quarkus.datasource.db-kind=postgresql

# Hibernate ORM settings
# Options: none, drop-and-create, update, validate
%dev.quarkus.hibernate-orm.database.generation=drop-and-create

# Optional: Show SQL in logs (for debugging)
%dev.quarkus.hibernate-orm.log.sql=true
The rest of the code is here in case the reader would like to take a look at more details: Quarkus Employee Register Service
Testing our API using Postman
With the updated code, we can run:
1
$ ./mvnw quarkus:dev
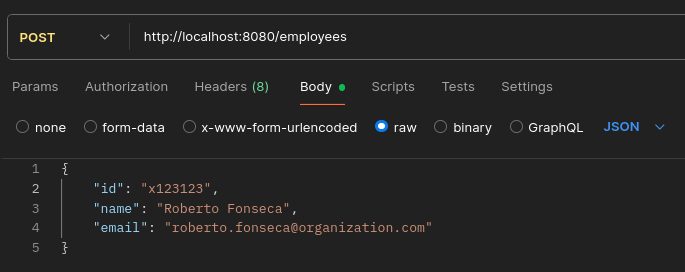
Finally, we can use Postman to send HTTP calls to our application in localhost. For example, if we want to register a new employee in the database, we can use a POST call to /employees and pass a JSON body with the fields for the new employee.