Learning how to create Debian packages
Since this is my first blog post talking about something specific to Debian, I belive introducing it first is a good a idea.
Debian is a Free Open-Source Linux distribution that is known for its stability, security and extensive software repository. It is actively developed by a community-driven workflow, which emphasizes its open-source principles.
Package Management
You probably have already heard about Debian’s package manager called APT (Advanced Package Tool). It’s a complex system responsible for managing a massive set of repositories and software packages, making it easy for the users to do basic things like installing, udpadating and removing software in their machines.
Why and how to contribute with packages for Debian?
There are several reasons to why contribute, but the main one is that not only Debian, but a lot of Linux distributions that branch out from it such as Ubuntu or Linux Mint are largely used in commercial fields and backend servers. Debian plays a huge role in our lives nowadays and multiple systems are built on top of a Debian “core”.
Regarding how we can contribute, if you have any software that you would like to make it more easily accessible to other people then this is already a good start. How you create and publish this package to be downloadable by apt is something that we should take a better look at.
In particular, we’ll be using these great tutorials made by Joenio Marques da Costa:
I’ll try to focus more on my experience while doing these tutorial and lessons I learned. But of course, I’ll be showing the steps I followed as well and do my best to explain how I followed these tutorials.
Installing Debian Testing
The recommended version of Debian to work with packages is the Testing version. It has a nice balance between Unstable and Stable. The installer can be found here.
We don’t need ay sort of insane setup to start working with packaging software for Debian. We can simply use a virtual machine to install and run the operating system.
I decided to use libvirt via virt manager to install Debian Testing and start working on this task.
We also don’t need an installation with too much stuff. A very basic and raw Debian installation is enough. Any additional software can be installed after we have the system operating and running.
Configuring a development environment for Debian Packages
First of all, we should be able to access our Debian VM. We can do that by opening the Virtual Machine via virt manager, but I would rather work on this from the Host Machine via SSH.
Having Debian Testing working in a virtual machine, we start doing some preparations. First of all, ensure we have ssh-server enabled and running in the VM’s Debian:
1
2
3
4
# @vm
$ sudo apt upgrade && sudo apt update
$ sudo apt install openssh-server
$ sudo systemctl enable sshd
You can check the VM’s public IP by running ip a in the command line.
Alternatively, with the Debian VM running, check its IP by using the following commands in the Host Machine’s command line:
1
2
3
# @host
$ virsh net-list  # This command will prompt the used network name
$ virsh net-dhcp-leases <network-name>
Now we can access the VM through ssh:
1
2
# @host
$ ssh <username>@<VM-public-IP-address>
Enter your password, type yes in the terminal and press Enter. From now on, every command will be executed inside the @vm.
Now we can start installing some useful development tools to work with the packaging process:
1
$ sudo apt install devscripts debhelper debian-policy git-buildpackage pkg-perl-tools
You should also install apt-file and update your data base so dh-make-perl can find Debian packages referred by some Perl library:
1
2
$ sudo apt install apt-file
$ sudo apt-file update
Next it’s recommended to configure your git so all the dev tools can properly set the correct information when installing any sort of template and make your git log information more meaningful.
1
2
$ git config --global user.email "you@example.com"
$ git config --global user.name "Your Name"
The tool dh-make-perl also uses some variables to correctly fill some fields inside the debian/ directory with data when you install the repository:
1
2
$ export EMAIL=you@example.com
$ export DEBFULLNAME="Your Name"
You can write those line inside ~/.bash_profile so it automatically sets these variables whenever the system restarts.
Finally, if this is the first time you are using cpan, you must run the following command before running dh-make-perl so we have all the base configuration ready to go.
1
$ cpan
Creating package for the Perl library Hash::Wrap
Important: check if the library you chose is not a Debian Package already!
1
2
3
4
5
6
$ dh-make-perl locate Hash::Wrap
== dh-make-perl 0.124 ==
Parsing Contents files:
	ll.lz4
	md64.lz4
Hash::Wrap is not found in any Debian package
This is where we start diverging from the tutorial. Of course we don’t want to use the Hello World library because it does not provide ny real utility apart from learning how packages are structured in Debian.
And, again, it’s important to choose a library that is not a Debian package yet. At the time this blog post is published, this lirary will already be in a Debian package probably and the reader will have to choose another library to work with.
However, keep in mind that you can use any library of your interest to create packages for Debian. Don’t feel limited by the few option the tutorial shows you.
Our next step is to create the first version of our package. This can be done by executing the following commands. They will download and install the code from the upstream and setup some template files inside debian/:
1
2
$ mkdir hash_wrap_pack && cd hash_wrap_pack
$ dh-make-perl --pkg-perl --cpan Hash::Wrap
This created a new directory, along with a tar file, named libhash-wrap-perl. You can just cd into this directory and start working with the package.
First base changes
For this package in particular, and actually most packages you will work with, you need to check three files in debian/ and see if everything is ok: copyright, control and changelog.
debian/copyright:
Check for the copyrights of the pacages with the following commands:
1
2
3
$ grep -i -r --exclude-dir=.git --exclude-dir=debian copyright
$ licensecheck --shortname-scheme=debian,spdx --copyright --recursive .
$ scan-copyrights
They will help you find the copyright information you need without having to check all the files inside the repository. After using those commands, we’ve checked that the copyright information was incomplete and we need to re-organize some other stuff in the file.
The final result is this:
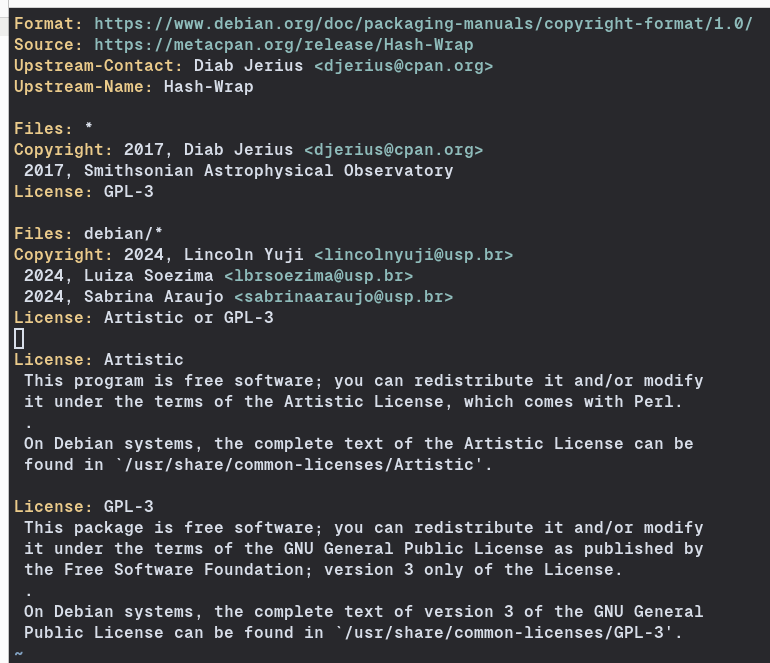
Then you can remove the DISCLAIMER message, then commit these changes and you are good to go.
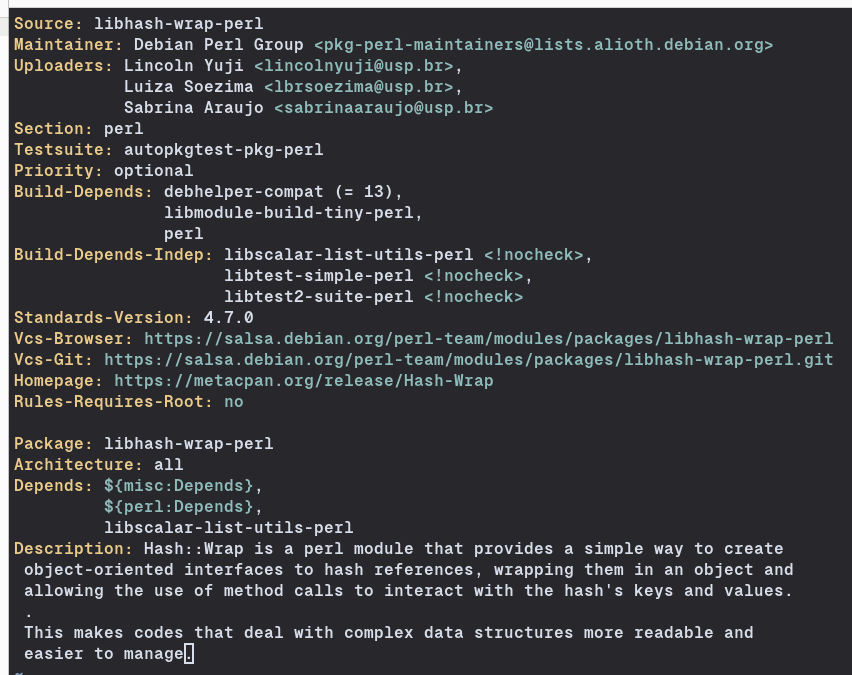
debian/control:
At the moment this blog was in production, the policy we should use for Standards-Version inside control is 4.7.0 and the version debhelper-compat is 13.
However, those changes were not necessary because the base configuration we received from dh-make-perl didn’t mess this up, but keep in mind that you might have to chage this with other packages.
You can use the following command to check Standards-Version and debheper-compat’s version, respectively:
1
2
$ dpkg-query --show --showformat '${Version}\n' debian-policy
$ rmadison --suite=unstable debhelper | cut -d"|" -f 2 | sed 's/\s\+//'
Often you will need to update the Description because dh-make-perl uses the description from the upstream to write it onto the file. However, this description is usually not good enough to keep in this file. It’s bery likely will have to change it to something more meaningful.
The final result of our changes was this:
Check if everything is ok with this file:
1
2
3
4
$ cme check dpkg-control debian/control
Reading package lists... Done
Building dependency tree... Done
Reading state information... Done
If no further changes are needed you can just commit this file and proceed to the following steps.
debian/changelog
Before changing this file, we should check if our package so far is correctly set up. To do so, we can just build it and run litian to check if everything is ok.
However, an issue that I had was that, for some reason, some env PERL variables were messed up and package installation paths were pointing to directories inside the user’s /home, which is NOT allowed by Debian packages at all.
To solve that, I had to run the following commands using env -i to start a clean environment.
1
2
$ env -i sudo pbuilder create
$ env -i sudo pbuilder update
This will build the package and ensure it’s updated. Now, with a new version built of the package, we should ensure we have all the dependencies installed by running:
1
$ env -i BUILDER=pbuilder git-pbuilder
Finally, we check if our packages is fine by using lintian:
1
$ lintian -I --profile pkg-perl --info
In particular, with this package, we get a warning which says: initial-upload-closes-no-bugs. This is something we will fix by opening an ITP report and updating our changelog file.
Now we can run some development tests and check if our packages successfully passes them all:
1
2
3
4
$ sudo apt-get install ubuntu-dev-tools # Contains dev tests
$ sudo adduser <username> sbuild        # Allows you to run without root
$ mk-sbuild sid                         # Creates a chroot i.e. sid-amd64
$ autopkgtest . -- schroot sid-amd64    # Builds and tests with the chroot created
After that, you should check the last lines and see something like:
1
2
3
All tests successful.
...
autodep8-perl-recommends PASS (superficial)
That means our package is fine and we can upload it. But, before that, remember that we have to open an ITP report and update our changelog.
To do so, we need to send an email to submit@bugs.debian.org. The subject and content of the email can be extracted by running:
1
2
$ dpt gen-itp > /tmp/mail
$ cat /tmp/mail
Use any email client to send it. After some minutes, you will receive a response like so:
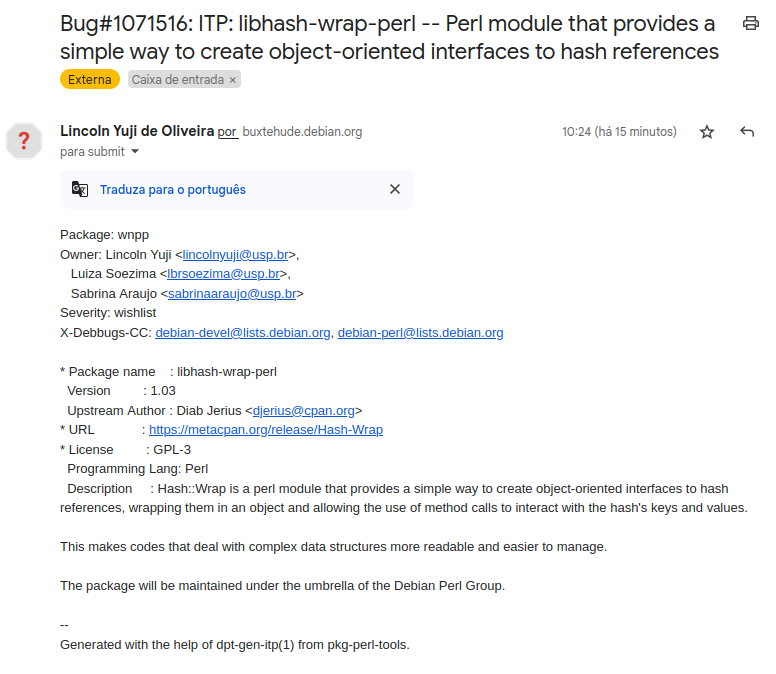
The bug report was created. This one in particular can be accessed through this link.
With this task done, we can update our debian/changelog file:
1
2
$ dch --closes 1071516 # Updates changelog message to close this bug
$ dch --release        # Switch 'unreleased' to 'unstable' status
This was the result:

Commit those changes and we can proceed to the next steps.
Preparations to upload the package
We need to create a Salsa account first. A moderator will check if everything is ok and then accept your registration into Salsa. Keep in mind that this can take some hours or even days.
After getting your account accepted, you need to associate an SSH key to your profile in Salsa Gitlab.
Note that this SSH key needs to be an SSH key configured inside the machine we are working with the package, that is, inside the Virtual Machine.
These are the steps I did to set up an SSH key in the Debian VM and associate to my Salsa profile.
Generate the SSH key using the ed25519 algorithm:
1
ssh-keygen -t ed25519 -C "your_email@example.com"
Then start the ssh-agent in the background:
1
eval "$(ssh-agent -s)"
Add your private key to the agent:
1
ssh-add ~/.ssh/id_ed25519
Now you can just copy and paste the content from cat ~/.ssh/id_ed25519.pub into Salsa Gitlab when associating a new SSH key to your profile. Note that you do this with your public key, not the private one.
After all this we can upload packages to Salsa Gitlab with no headaches or additional authentications.
Uploading the package to Debian Perl’s team repository (Not finished)
First of all, we need to join the Perl’s Team. We can do that by sending them an email with a small introduction and our Salsa username. The email I’ve sent can be found here: 2024/06/msg00000
However we had problems trying to contact the Perl’s Team and they did not answer any of our emails from our MAC0470 group.
I have uploaded our progress with this package on Salsa Gitlab: Hash Wrap on Salsa
We will be contacting Joenio, the same person who wrote the used tutorials, to finish the job and upload the package to the Perl’s Team.